Shopify: Adding multiple print files to your product variants
Adding multiple print files to your Shopify product variants
This “how to” covers assigning different print files to variants of a product. Under some circumstances you might find that the print file you have uploaded to your product is not suitable for each variation, or you may want to add an extra variant option to your product to allow customers to select from multiple print position options on the same product page.
Adding a single print file per variant
If you want your design printing on both a black and white t-shirt, for example, then the print file uploaded for a white t-shirt is not suitable for printing on black. In this case you will need to assign a different print file for these variants.
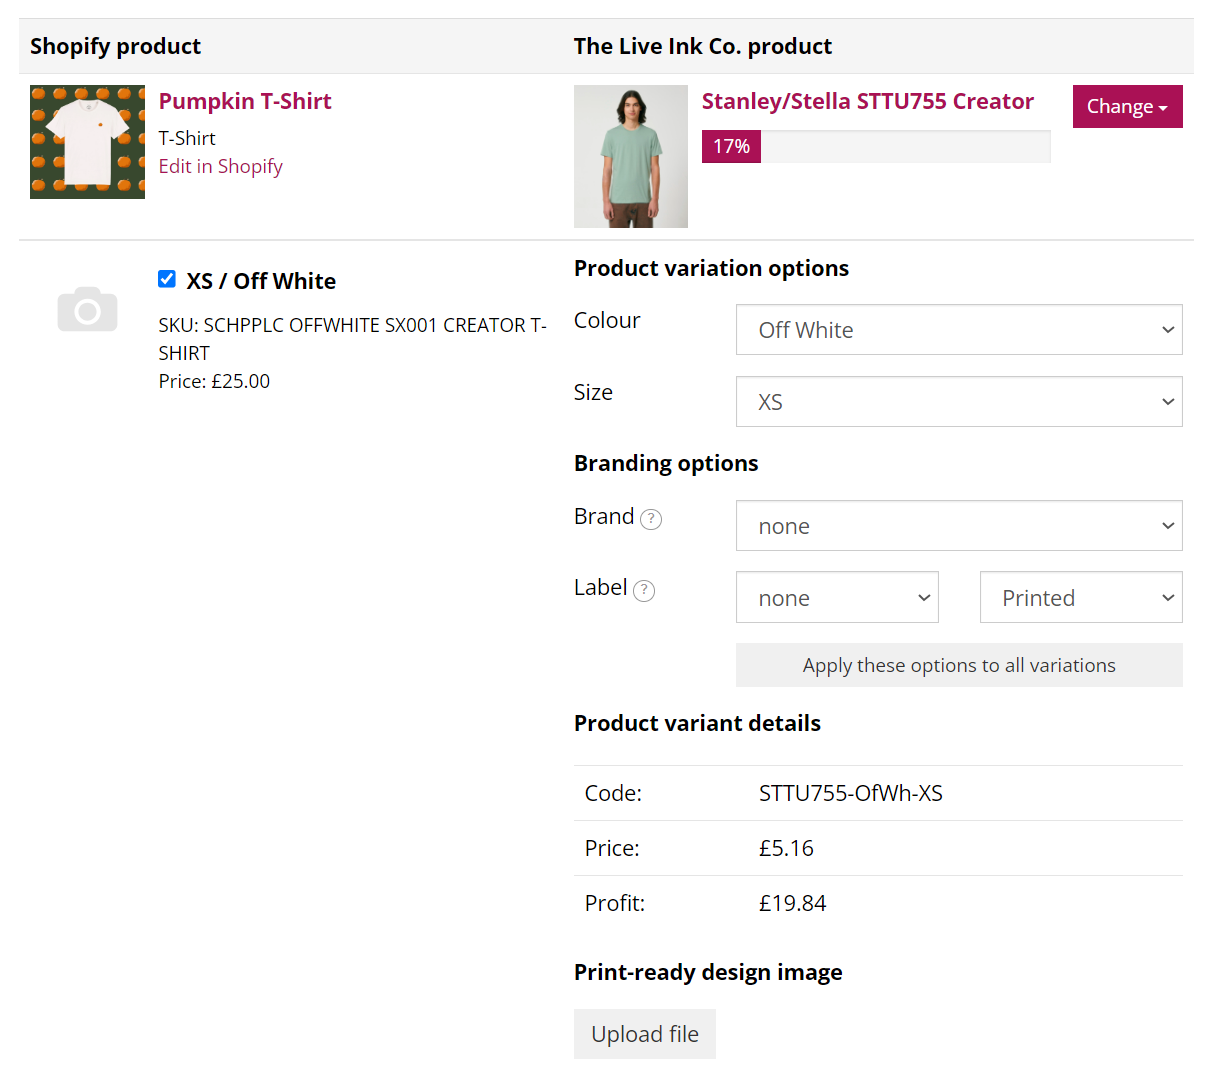
To assign a different print file for variants: log-in to your Shopify store, > open the Live Ink app > click the Link Products button > Click the Edit button next to the product you would like to upload additional print files to.
Scrolling to the bottom of this page will display the print file that is currently assigned to each of your variants. This can be left as it is - any print files added to your variants will override this file, but the variants that don't have any uploaded will default to this file.
Scroll back to the top of the page.
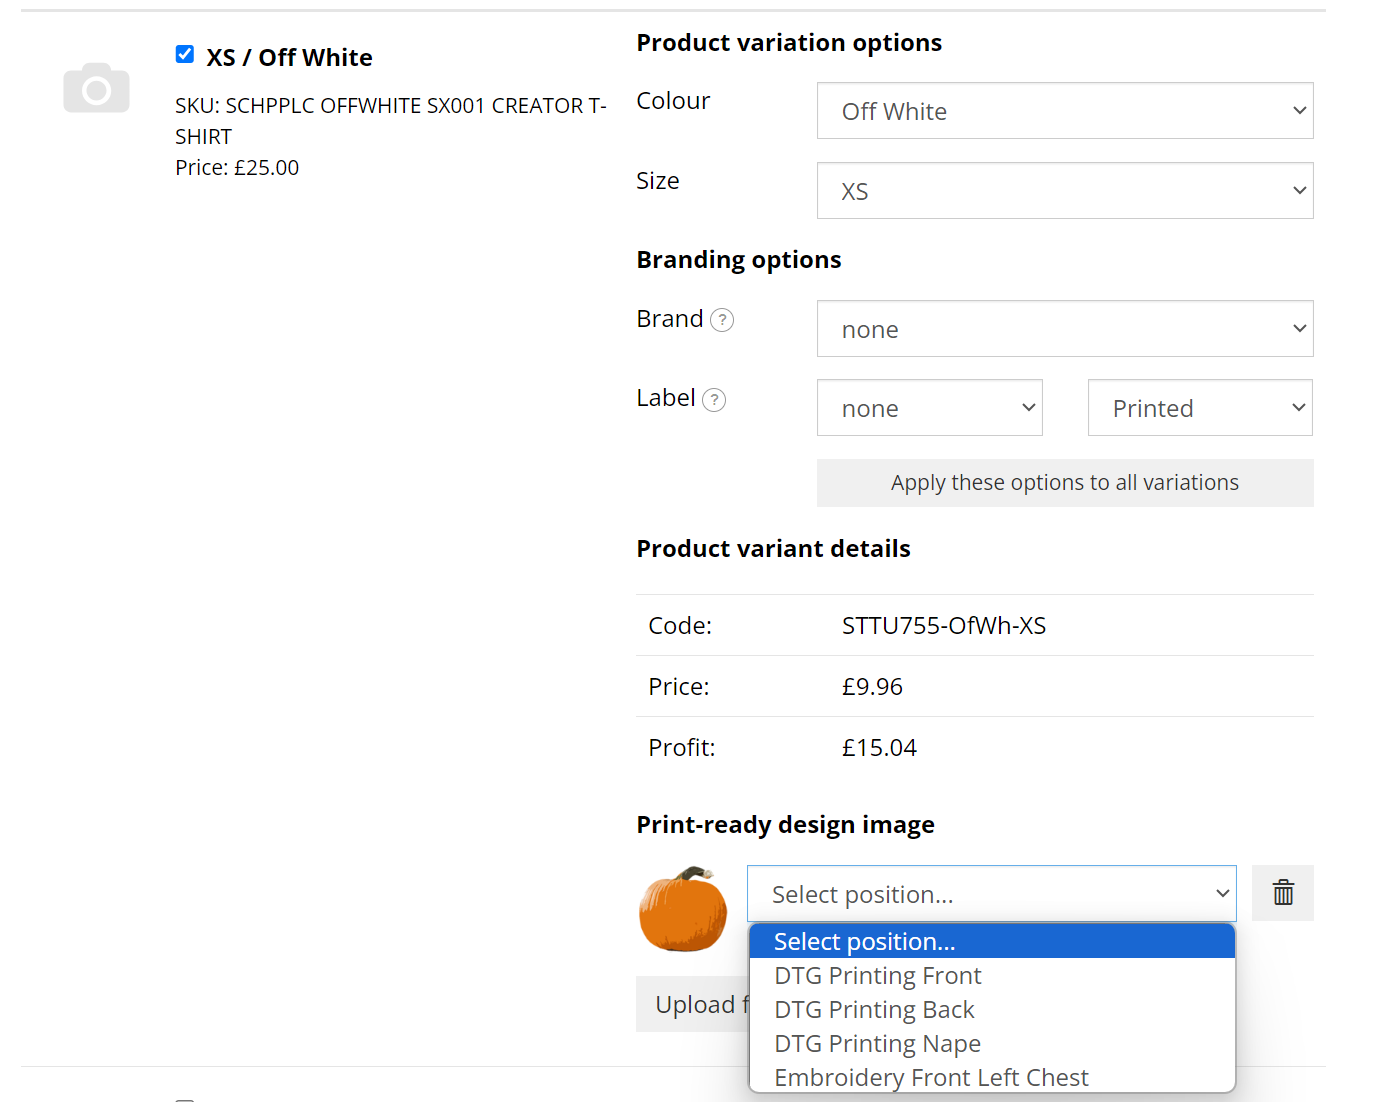
Working from the top of this page you can start adding print files to any variants that require one. The design for this product is black, you need to upload a print file that is a contrasting colour such as white.
In the Live Ink product column, for each variant, there is a Print files Upload button. Click this button and upload the file you would like to be use.