Shopify: Make Changes and Checking Linked Items
Making Changed to Products Already Linked to Live Ink
This step-by-step guide explains how to make changes to your existing Shopify products on your Live Ink account.
Step 1: Access the Live Ink App
-
Log in to your Shopify Admin.
-
Go to Apps in the left-hand menu.
-
Select the Live Ink app from your list.
-
Sign in to your Live Ink account when prompted.
-
Note: Your Shopify and Live Ink login details are separate for security.
-
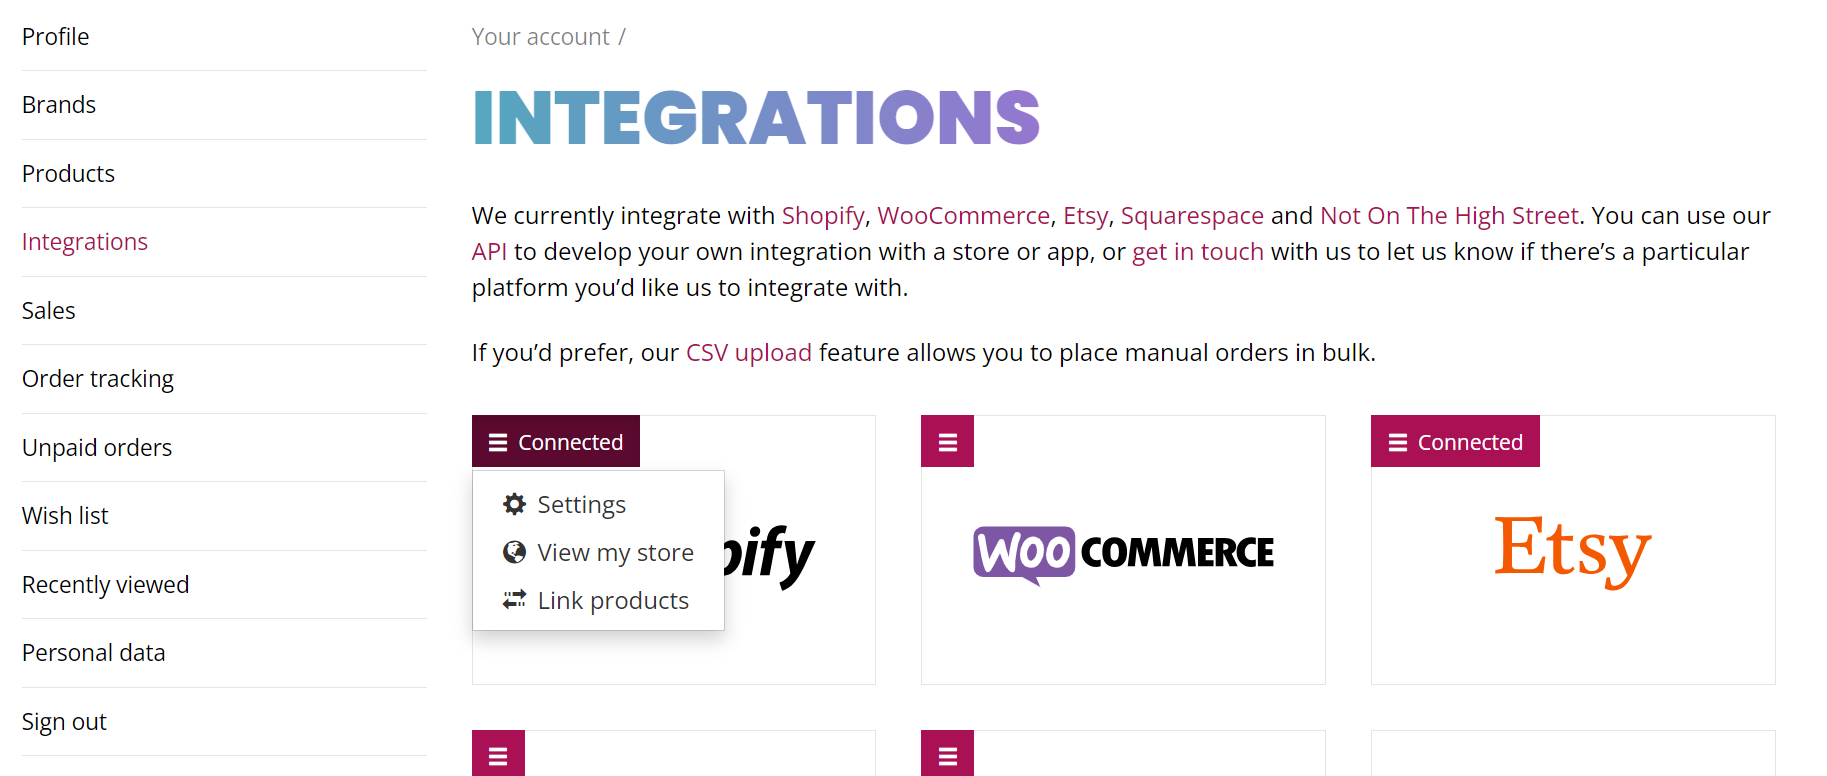
Step 2: Enter the Linking Interface
-
On the Live Ink dashboard, click the "Link Products" button.
-
You will see a list of all products currently listed on your Shopify store.
-
Find the product you want to link and click the "Edit" button next to it.

Step 3: Map Your Variants (Size & Color)
Each Shopify variation must be manually "mapped" to a Live Ink variation.
-
Scroll down to the list of Variants.
-
Check the box next to the variant you want to link.
-
Correct the Auto-Populated Data: The app may try to guess the size/color, but you must use the dropdown menus in the "Live Ink Product" column to select the exact match.
-
Example: If your Shopify variant is "Large / Black," ensure the Live Ink dropdowns are set to "Large" and "Black."
-
-
Repeat this for every variant you want Live Ink to fulfill.

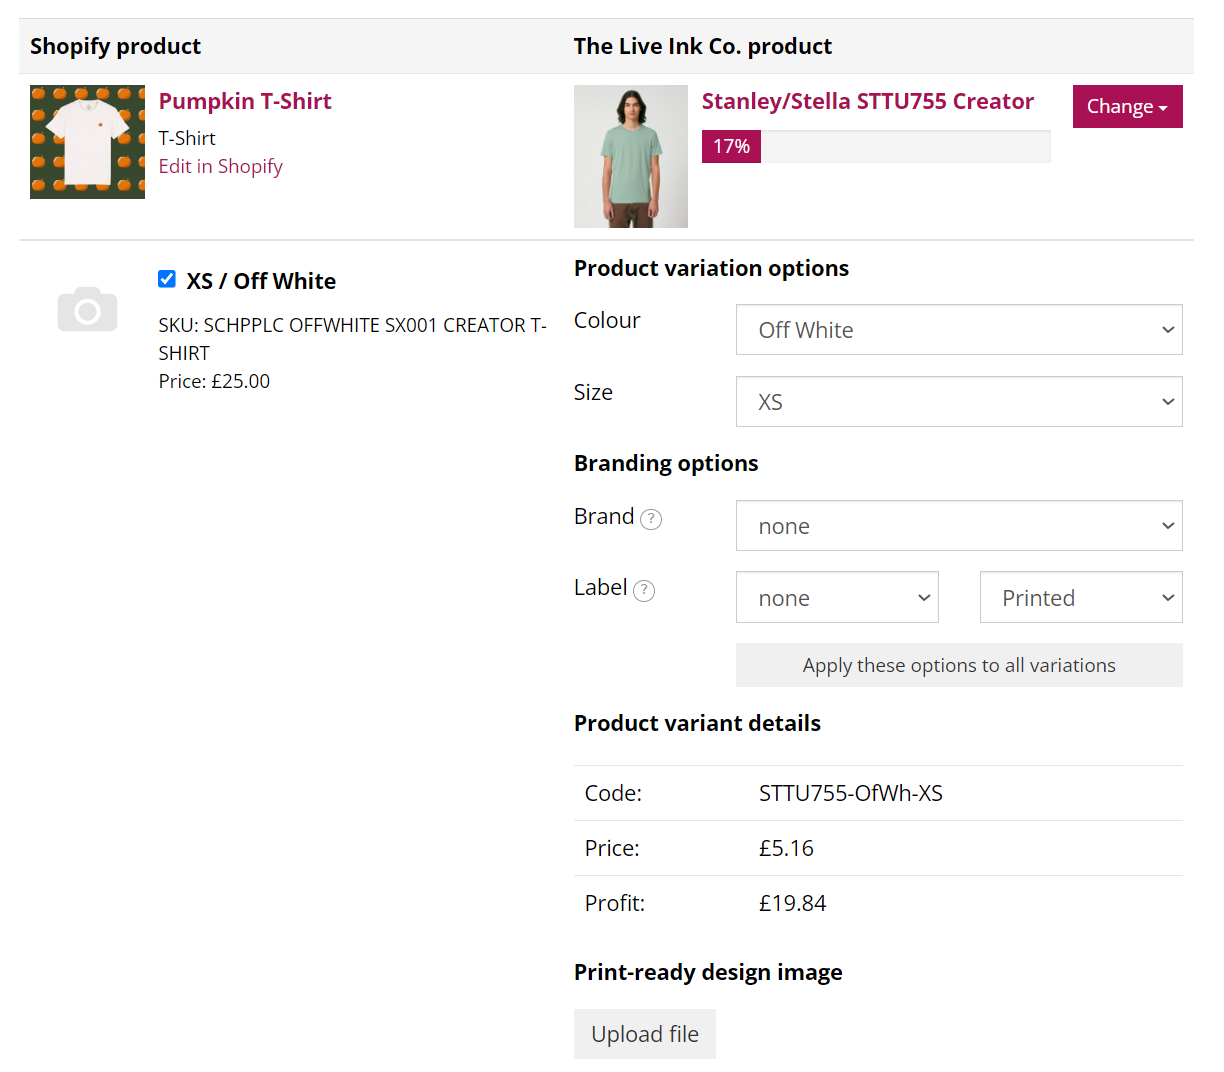
Step 4: Add Labels and Artwork (Optional per Variant)
Inside the variant row, you have additional options:
-
Brand/Label: If you have set up a brand profile, select your brand and the specific neck label you want printed.
-
Individual Print Files: If certain variants (like a white shirt vs. a black shirt) require different colored artwork, you can upload specific files here.
Step 5: Upload Final Assets for Quality Control
Scroll to the bottom of the page to provide the global assets for this product:
-
Product Mock: Upload a mockup image of the finished product. Live Ink uses this for quality control to ensure the print placement matches your vision.
-
Print File: Upload your high-resolution artwork (300dpi at correct print size).
-
Note: If you already assigned individual print files to every variant in Step 4, you do not need to upload a global one here.
-

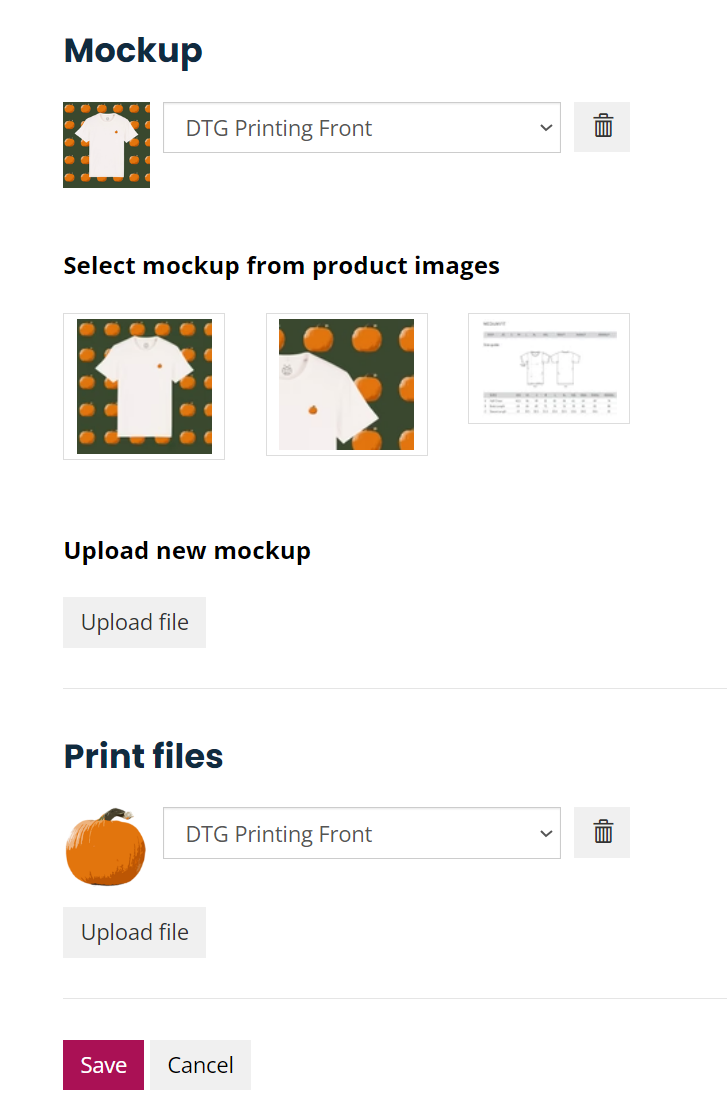
Step 7: Save and Verify
-
Click "Save" at the bottom of the page.
-
You will be redirected to your list of linked products.
-
Check the Progress Bar: A green bar shows the percentage of variants linked. If it is not at 100%, click "Edit" again to link any remaining sizes or colors.
Important Reminders
-
Accuracy is Key: Errors in variant mapping (e.g., mapping a Small to a Large) will result in the wrong item being shipped to your customer.
-
Artwork Specs: All files should be 300dpi at the actual size you want them printed. Use the Live Ink designer tool beforehand if you are unsure about placement.